Miele cooktops are known for precise temperature control, sleek design, and dependable everyday performance. Whether you have an induction, electric radiant, or gas cooktop, regular maintenance and prompt repairs help keep it working safely and efficiently. This guide covers common problems and practical solutions.
Understanding Your Miele Cooktop
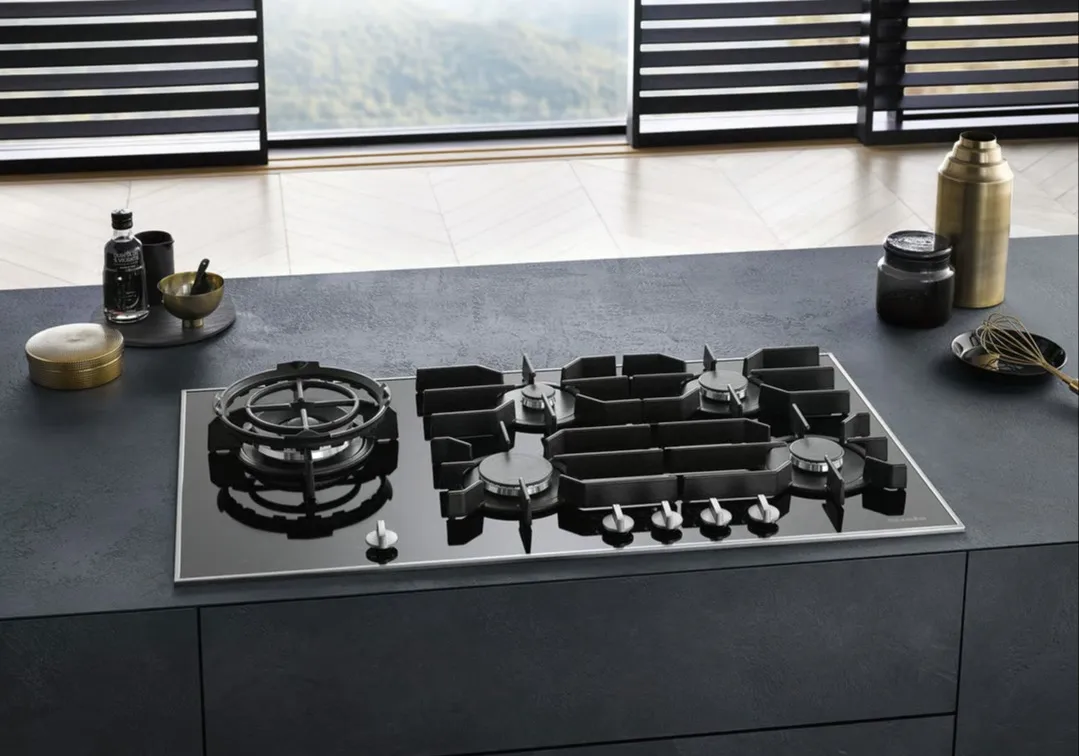
Miele produces several cooktop types for different cooking preferences. Induction cooktops heat cookware directly through magnetic energy, electric radiant models use heating elements beneath a glass surface, and gas cooktops rely on burners and ignition systems for instant flame control.
Each type includes different components, but most cooktops share common parts such as controls, heating zones or burners, sensors, wiring, and surface materials. Understanding these parts makes troubleshooting much easier.
Induction cooktops require compatible magnetic cookware. Electric radiant cooktops depend on intact heating elements and temperature controls. Gas cooktops rely on clean burners, working igniters, and proper gas flow. Knowing which system you have is the first step in identifying the source of a problem.
Cooktop Not Powering On
A cooktop that does not turn on at all often has a power supply issue. Start by checking the circuit breaker. Cooktops draw substantial power, especially electric and induction models, so a tripped breaker is a common cause.
If the breaker looks normal, turn it fully off and then back on. Some breakers appear to be on even after tripping partially. This reset can restore power immediately.
Check whether the control panel shows lights, indicators, or sounds. If the cooktop appears completely dead, the power connection, terminal block, internal fuse, or main control board may be at fault.
For hardwired units, loose wiring at the junction box can interrupt power. This should only be inspected with power disconnected. Burn marks, melted insulation, or damaged connectors indicate overheating and require repair before using the cooktop again.
Some induction models have lock functions that make the unit appear unresponsive. Verify that child lock or control lock is not activated before assuming a major electrical failure.
Burner or Heating Zone Not Working
If one burner or zone fails while others still work, the issue is usually isolated to that individual heating circuit. On electric radiant cooktops, the heating element beneath the glass may have failed. On induction units, the induction module or coil for that zone may be faulty.
Begin by testing multiple settings. If a zone works only on some levels or heats inconsistently, the control switch, sensor, or power regulator may be failing rather than the element itself.
For gas models, remove the burner cap and inspect the burner head. Food debris and grease often block flame ports and create uneven or absent ignition. Clean all openings carefully with a soft brush or wooden toothpick. Avoid enlarging the ports with metal tools.
Induction zones may refuse to activate if cookware is not compatible or if the pan is too small for the selected area. Test with a known induction-ready pan that has a flat magnetic base.
If a zone remains cold despite proper power and cookware, internal electrical testing is usually needed to confirm whether the fault lies in the element, coil, sensor, or control electronics.
Induction Cooktop Not Detecting Cookware
Cookware detection problems are common with induction units. First, verify that the pot or pan is induction compatible. A simple magnet test helps—if a magnet sticks firmly to the bottom, the cookware is usually suitable.
The pan must also be the correct size for the cooking zone. Very small cookware may not register properly, especially on larger zones designed for broader pan bases.
Warped or uneven cookware bottoms reduce contact and can interfere with detection. Even if a pan is technically compatible, a badly warped base may cause intermittent operation.
The glass surface should be clean and dry. Moisture, spilled food, or residue between the pan and the cooktop can affect performance and sensor readings.
If multiple compatible pans fail on one zone only, the pan detection circuit or induction coil for that zone may be malfunctioning. If no zones detect cookware, the problem may involve the main power electronics or control board.
Gas Burner Not Igniting
A gas burner that clicks but does not light often has a blocked burner, wet ignition components, or poor gas flow. Start by cleaning the burner cap and head. Misaligned burner parts frequently prevent proper ignition.
Make sure the burner cap sits correctly in its designed position. Even slight misalignment can stop the flame from spreading from the igniter to the gas ports.
If the igniter clicks but the burner does not light, inspect the small ignition electrode. Grease, moisture, or food residue can prevent the spark from reaching the gas. Clean the electrode gently and let it dry fully.
If there is no clicking sound at all, the spark module, ignition switch, or wiring may have failed. On some models, a faulty switch on one knob can affect ignition behavior across multiple burners.
Also verify gas supply. If all burners fail to ignite, confirm that the shutoff valve is open and that gas is available to the appliance. If you smell gas but ignition does not occur, stop immediately and ventilate the area before further inspection.
Weak, Uneven, or Yellow Flame
A healthy gas flame should usually be blue and stable. Yellow flames, lazy flames, or uneven burning often point to restricted airflow, clogged burner ports, or contamination.
Remove the burner parts and clean them thoroughly. Grease buildup and food spills interfere with proper gas distribution and air mixing. Pay special attention to the small ports around the burner head.
Check that burner caps are dry after cleaning. Moisture can temporarily distort flame shape until it evaporates completely.
Improper assembly after cleaning is another common cause. Burner caps and rings must sit flat and align correctly with the base. If they rock or sit crooked, flame quality suffers immediately.
If flames remain abnormal after cleaning and reassembly, the regulator or gas supply pressure may need attention. That type of diagnosis usually requires a trained gas appliance technician.
Cooktop Heating Too Slowly
Slow heating can be frustrating, especially on electric and induction models expected to respond quickly. On induction cooktops, start by checking cookware quality. Thin, low-quality pans often heat poorly even when they are technically compatible.
For radiant electric models, a weak or aging heating element may still function but produce less heat than normal. This often appears as a burner that takes much longer than before to boil water or heat a pan.
Dirty or damaged glass surfaces can also reduce heat transfer efficiency. Keep the cooking surface clean and free from heavy burned-on residue.
Incorrect power supply can limit performance. Some cooktops require specific voltage and wiring configurations to operate at full output. If the unit was recently installed and has always heated poorly, installation wiring should be reviewed.
Induction models may also reduce power automatically if internal temperatures become too high. Blocked ventilation, heavy use, or cooling fan issues can trigger protective power reduction.
Cooktop Overheating or Shutting Down Unexpectedly
A cooktop that shuts off during use may be protecting itself from overheating. Induction and electric models use temperature sensors and internal cooling systems to prevent damage.
Check ventilation openings around the cooktop. Built-in models require proper airflow below the unit. If drawers, insulation, or stored items block ventilation, heat can build up inside the appliance.
Cooling fans in induction cooktops should operate when needed. If the fan is obstructed, noisy, or not running, the unit may shut down to avoid overheating internal electronics.
Surface temperature sensors can also fail and send incorrect readings. A faulty sensor may cause premature shutdowns or excessive heat output.
For gas cooktops, overheating is less about electronics and more about flame regulation and surrounding heat exposure. Damaged knobs, stuck valves, or external heat affecting controls should be checked.
Repeated shutdowns without obvious blockage usually indicate a component issue that requires internal diagnosis.
Cracked Glass Cooktop Surface
A cracked glass surface is a serious problem. Stop using the cooktop immediately. Cracks can worsen with heat, allow moisture into internal components, and create electrical hazards.
Small chips at the edge may appear minor, but even these can expand over time from heat cycling and cookware impact. Large cracks across heating zones are especially dangerous.
Glass cooktops usually crack because of impact, thermal shock, or structural stress. Dropping a heavy pot, placing a hot lid on a cold surface, or overtightened installation clips can all contribute.
Do not attempt to seal a crack with adhesive or continue cooking around the damaged area. The glass top typically needs replacement as a complete panel.
To prevent future damage, avoid sliding rough cookware, do not place heavy items on the surface unnecessarily, and allow hot zones to cool naturally before cleaning with cool liquids.
Scratches, Stains, and Burned-On Residue
Glass cooktops are durable but not immune to cosmetic damage. Fine scratches often result from dragging cookware or using abrasive cleaning pads. Deep scratches may eventually weaken the surface if combined with heat stress.
Burned-on residue can usually be removed with a cooktop cleaner and a scraper designed for glass surfaces. Hold the scraper at a low angle and work carefully to avoid gouging the surface.
Sugar spills require special attention. Melted sugar and sugary mixtures can permanently damage glass if left in place while hot. Remove them carefully as soon as the surface is safe enough to approach, following the cleaner instructions for ceramic glass.
Avoid steel wool, harsh powders, and aggressive scrubbing tools. These can dull the finish and create permanent marks.
Regular cleaning after each use prevents buildup from becoming difficult to remove. A smooth, clean surface also improves cookware contact and cooking performance.
Touch Controls Not Responding
Modern cooktops often use touch controls instead of mechanical knobs. If the panel does not respond properly, start by cleaning it. Grease, moisture, or cleaning residue can interfere with touch sensitivity.
Dry the panel completely. Even a thin film of water may cause the controls to ignore input or behave erratically.
Reset the cooktop by switching off power at the breaker for several minutes. This can clear minor electronic glitches and restore normal function.
If only certain buttons fail, the touch membrane or control interface may be damaged. If the entire panel is unresponsive but the unit has power, the main control board or user interface board may be faulty.
Heavy objects placed on the control area can also trigger safety lockouts or continuous-beep warnings. Make sure nothing is resting on the panel.
Error Codes on the Display
Electronic cooktops often show error codes when something is wrong. These codes may point to overheating, sensor faults, cookware detection issues, communication errors, or internal power problems.
The first step is to note the exact code and when it appears. Does it happen immediately at power-up, only on one zone, or after extended cooking? That pattern helps narrow the cause.
Temporary error codes sometimes clear after the unit cools down or after a power reset. Persistent codes usually indicate a specific failed component or wiring problem.
Induction units commonly display faults related to pan detection, inverter modules, temperature sensors, or cooling issues. Electric radiant models may show sensor or control faults. Gas models with electronic controls may show ignition or valve-related errors.
Do not ignore repeated error messages. They are early warnings that often prevent further damage if addressed promptly.
Cooktop Keeps Beeping
Beeping without normal operation usually means the controls are detecting a problem. Moisture on the panel is one of the most common causes. Dry the surface thoroughly and remove any utensils, towels, or pans resting on the controls.
Some cooktops beep when a button is stuck or when touch input is being registered continuously. Clean around the control area and restart the appliance.
Induction models may also beep if unsuitable cookware is placed on a zone or if a pan is removed while the zone is still activated.
In some cases, internal communication faults or failing control boards cause repeated beeping along with flashing indicators. If the beeping returns after cleaning and resetting, internal electronics should be inspected.
Knobs Turning Poorly or Feeling Loose
Gas cooktops and some electric models use physical knobs for burner control. If a knob feels loose, stiff, or difficult to turn, start by removing it and cleaning around the shaft. Grease buildup often creates resistance.
Inspect the knob itself for cracks or worn internal splines. A damaged knob may spin without properly engaging the valve or switch stem.
If the control shaft is stiff even with the knob removed, the underlying valve or switch may be dirty or worn. Gas valves especially should not be forced. Excessive force can damage the valve or create unsafe operation.
Loose control assemblies behind the panel can also make knobs wobble. Tightening mounting hardware may solve the problem if caught early.
Cooling Fan Running Constantly
On induction cooktops, the cooling fan may continue running after cooking ends. This is often normal. The fan helps remove residual heat from internal components and may operate for several minutes after use.
However, if the fan runs excessively long or starts even when the cooktop is idle and cool, a temperature sensor or control issue may be present.
Dust buildup can restrict airflow and cause the system to run the fan longer than necessary. Keeping surrounding cabinetry and air channels clean helps maintain proper cooling.
A noisy fan may indicate worn bearings or debris contacting the fan blades. Ignoring fan problems can lead to overheating and electronic failure later.
Installation and Fit Problems
Poor installation can cause performance and durability issues from the beginning. A cooktop that is not seated correctly in the countertop may flex, vibrate, or suffer heat retention problems.
Check that the unit is level and properly supported. Excess pressure at one corner can stress glass surfaces and internal frames.
Built-in clearances matter. Insufficient space below the unit can restrict cooling airflow and cause overheating. This is especially important with induction models.
Electrical installation must match the model requirements exactly. Incorrect voltage, improper grounding, or undersized wiring can lead to weak performance or repeated shutdowns.
Gas models require proper connection, pressure regulation, and leak-free fittings. Any suspected gas installation issue should be addressed immediately before further use.
Cleaning and Daily Care
Routine cleaning prevents many common cooktop problems. Wipe spills promptly once the surface is safe to touch. This prevents residue from hardening and reduces the chance of stains or blocked burner openings.
For gas cooktops, remove grates and burner caps regularly and clean them with warm water and mild detergent. Dry them fully before reassembly.
For glass electric and induction surfaces, use cleaners designed for ceramic glass. A soft cloth or non-abrasive pad is usually enough for daily maintenance.
Avoid allowing acidic foods, salt, sugary spills, or heavy grease to remain on the surface for long periods. These can damage finishes or interfere with performance.
Do not use the cooktop as countertop storage. Heavy objects, rough bases, and accidental impacts are major causes of cosmetic and structural damage.
Maintenance Schedule
A simple maintenance routine keeps the cooktop operating reliably. After daily use, wipe the surface and remove obvious spills or grease.
Weekly cleaning should include a more thorough wipe-down of the entire cooking area, controls, and surrounding edges. On gas models, clean burner caps and grates as needed.
Monthly, inspect the cooktop for loose parts, ignition issues, scratched glass, blocked burner ports, or signs of overheating. Check that all zones or burners heat properly.
Every few months, review ventilation around the unit, especially for induction models installed above drawers or built-in cabinetry. Dust and clutter below the cooktop can affect cooling.
At least once a year, consider a more detailed inspection if the cooktop gets heavy daily use. Catching worn components early often prevents larger failures.
Safety Considerations
Always disconnect electrical power before inspecting internal components. For gas cooktops, shut off the gas supply before working on burner assemblies beyond basic cleaning.
Never continue using a cooktop with a cracked glass surface, exposed wiring, repeated sparking problems, or the smell of gas.
Keep flammable materials away from the cooking area. Avoid storing paper, oils, or aerosols near burners or hot zones.
Use cookware of the proper size and type. Oversized pans can trap heat around controls, while unstable cookware increases the risk of spills and breakage.
Children should not operate the cooktop unsupervised. Lock functions on electronic models are helpful and should be used when appropriate.
When More Advanced Repair Is Needed
Some issues go beyond routine cleaning and simple checks. Internal electrical faults, failed induction modules, damaged radiant elements, faulty spark systems, and control board problems usually require deeper disassembly and testing.
Glass replacement, gas valve repair, and wiring repairs should be handled carefully because mistakes can affect both safety and long-term reliability.
If the cooktop repeatedly trips breakers, shows persistent error codes, shuts down under normal use, or heats unpredictably, further diagnosis is usually necessary before more damage occurs.
Troubleshooting Quick Reference
For no power: check breaker, verify power supply, inspect lock settings, reset the unit.
For one burner not working: test other zones, clean burner parts, verify cookware, inspect the heating circuit.
For gas ignition failure: clean burner and igniter, align burner cap, verify gas supply, dry wet components.
For induction pan detection problems: use compatible cookware, check pan size, clean the glass, test another zone.
For touch control issues: clean and dry the panel, remove objects from controls, reset power, inspect the control interface.
For overheating or shutdowns: check ventilation, confirm cooling fan operation, inspect for blocked airflow, evaluate temperature sensors.
For weak flames: clean burner ports, reassemble burners properly, inspect for gas flow issues.
By following this guide, your Miele cooktop can continue delivering reliable performance, precise control, and safe daily operation for years to come.